
FREE SHIPPING on orders over $199* (exclusions apply)
See Details
masqué


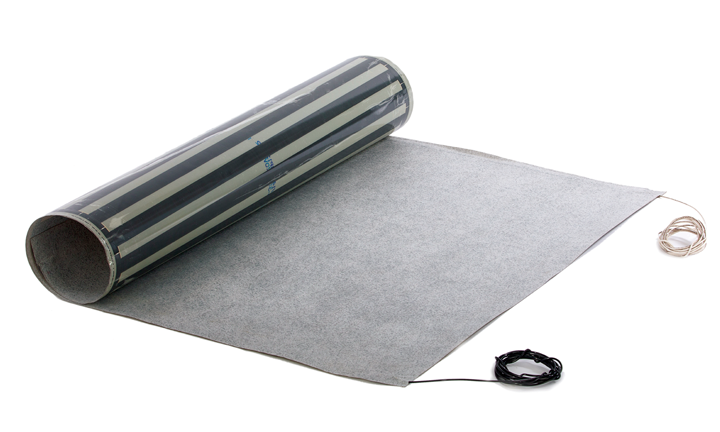

QuietWarmth Peel & Stick pour carrelage et sols collés 1,5 pi x 10 pi (240 V)
QuietWarmth Peel & Stick est un système de chauffage rayonnant léger, propre, silencieux, hypoallergénique, hautement efficace, ultra-mince et sans entretien pour les planchers en carreaux et collés.
Vendor:
MP Global Products
SKU:
QWT1.5X10F240
- CA$254.00
CA$278.00- CA$254.00
- Prix unitaire
- par
Description
xIdéal pour ajouter un chauffage au sol sûr et abordable à votre maison.
QuietWarmth Peel & Stick est un système de chauffage rayonnant léger, propre, silencieux, hypoallergénique, hautement efficace, ultra-fin et sans entretien pour les sols carrelés et collés.
D'une épaisseur d'environ trois cartes de crédit empilées (1,27 mm), le film chauffant rayonnant QuietWarmth Peel & Stick offre jusqu'à 85 % de couverture de surface chauffée pour les revêtements de sol traditionnels en carrelage, pierre ou marbre, sans aucun point chaud ou froid. Visitez notre Centre de connaissances pour en savoir plus.
Il s'agit d'un film chauffant rayonnant hautement efficace intégré à une membrane anti-fracture imperméable qui aide à isoler les fissures jusqu'à 9,5 mm de large.
Tous les produits QuietWarmth sont configurés avec des connexions fixées en usine et conviennent à tous les types de projets de rénovation ou de construction neuve.
|
• Installation rapide et facile |
• Aucun mortier autonivelant nécessaire ! |
|
• Ultra-fin, moins de 1,27 mm |
• 12 watts par pied carré |
|
• Membrane d'isolation des fissures |
• 99,9 % de l'énergie transformée en chaleur |
Instructions
xInstruction manual link:
Instructions d'installation et d'utilisation du chauffage radiant autocollant QuietWarmth pour carrelage et sols collés
Install Steps:
Installation Steps:
|
Step #1 |
Step #2 |
Step #3 |
|
Sketch Your Layout Allow at least 6 in. clearance between the edge of the mats and the wall. Ensure no cables/wires cross over any of your heating mats. Locate Your Thermostat Location of the thermostat should be approximately 60” (152 cm) above the floor on an inside wall, near the center of the room to allow the connection leads to reach. A 3" deep box is recommended for the thermostat. |
Peel & Stick Your Mats With the peelable release liner still on, position all the mats into place. Make sure the leads are run within reach of the wall of the room where the thermostat/junction box will be located and that there are no obstructions or floor penetrations in the way. Be sure to leave clearance to walls or partitions at the connector end for wiring and final connections. When all the mats are in proper position, peel & stick your mats to the subfloor starting with the end For adjacent mats, follow the same procedure starting with alignment of the side by side mats in a butt joint fashion. Do not overlap mats. As the mats are installed, locate the thermostat sensor wire/probe. Affix into position with a small amount of tape. The sensor should extend approximately 6” to 12” from wall adjacent to the mat shown. Be careful not to put your sensor near other heating sources such as a heating duct below the floor. Follow the "Electrical Installation" instructions in the manual to complete the wiring portion of your QuietWarmth install. |
Tile Directly Overtop
These install steps are meant as a guide and not a subsitution for the QuietWarmth installation manual linked above. Please read it in it's entirety before beginning your installation. |


Multiple Mat Installation:
Installations with multiple heating mats will require a junction box to gang the connections together. If a junction box is required, it should be located directly beneath the thermostat, 12” to 18” above the floor. The total number of mats used in a single circuit is limited to 15 amps.
When specifying multiple width heating mats for the same area, make sure that the total power required does not exceed the total power of a single circuit. Add additional 20 amp circuits as required for proper electrical supply to the installation.
WARNINGS
- QuietWarmth® Peel & Stick Radiant Heat should be installed on properly prepared stable subfloors.
- Must be installed on a dedicated 20 amp circuit. Do not connect lights, outlets, or any other electrical device to any branch circuit used with the QuietWarmth®.
- Never cut, puncture, or otherwise alter the mats to make them fit. Punctures, cuts, or modifications to the heating mats may result in risk of electrical concerns and will void the warranty.
- All wiring, fuses and/or circuit breakers must conform to National Electrical Code requirements.
- All wiring must run through conduits to junction boxes.
- Vinyl or linoleum floor coverings are never acceptable for use with QuietWarmth® Peel & Stick Radiant Heat